"The Fire In The Monster" Powerplant Chapter One, Engine Lower End Page 3

""The Fire In The Monster""

Mar. 01, 2000 By Patrick J Chicas
    
   With the all the case screws set, now is when I generally prefer to put the engine in the frame. It's easier to handle without all the heavy gears etc. Also with the motor mounted securely it's far easier to tighten the large fasteners on the ends of the shafts.

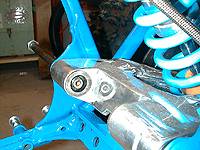
It's a good idea to pump some waterproof greas int the large hole in the motor the swingarm bolt goes through. This will help prevent the bolt from corroding.

Swingarm bolt should look like this. Install the swingarm inner bushings and dust seals. A The lower engine mount bolt and spacer come next. Then the forward motor mounts.
   With the engine in the frame it's time to install the primary drive assembly:

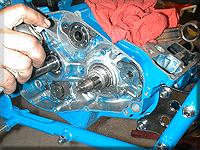
With the engine bolted securely in the frame we are ready to install the primary drive, clutch and kickstart. Always keep a rag stuffed in the open crankcase to prevent stray parts from dropping in.

Put a new "O" ring on the crankshaft spacer, hose it down with spray silicon and TWIST it as you push it into place. This prevents the crank seal from folding in. Crank spacer properly installed.

Timing marks.

Match up with the timing mark on the balancer drive gear with the mark on the crank. Then install the clutch drive gear and the crank nut with blue Loc-Tite. (NOTE! THIS NUT IS REVERSE/LEFT HAND THREAD). Torque to spec.
   And now for the kickstart mechanism:

Timing marks on the kickstart drive.

Kickstart assembly ready to install. Install the kickstart idle gear, washer and circlip. Then insert the kickstart shaft, rotate it clockwise until it stops. Grab the return spring with pliers and insert the spring end into it's hole (be careful, this spring WILL BITE!).
       We ran into a little parts delay so we'll put the time to good use and install the Cylinder base studs:

Due to the abuse of the squid that previously owned and tortured this poor 'Zilla we also had to replace all the cylinder base studs. The trick to install is to tighten two of the old nuts against each other. Use red Loc-Tite to install these permanently.

Two nuts tightened against each other. Tighten the stud, then with a > wrench on one and socket on the other loosen the nuts and remove.
   Our parts having arrived we're back at the primary drive, clutch and balancer installation.

Click Here for Page Four!

Click Here to go back.


Off-Road.com Newsletter
Join our Weekly Newsletter to get the latest off-road news, reviews, events, and alerts!