Honestly, I never thought I’d build one. I scoffed at the idea of building a radio controlled crawler that actually looked like its 1:1 counterpart. After all, totally scale rc cars and trucks just don’t perform like a competition rig. After watching many builds at rccrawler.com, I started to get the itch and I started to research the best parts available to build my own. What I soon realized, after starting the build, was that you have to throw out the idea that performance is the ultimate goal. While you can turn out a great little crawler with much capability, looks precede “crawlability” in this realm. Covering the entire build is very difficult, as is the build….and it seems that, much like a real Jeep, the project will never end…….so here is the beginning.
The first piece of the build that I needed to find was the chassis. Normally, a quick phone call to one of the many chassis builders at rccrawler.com would have been in order but with the fairly new “scale” craze evolving so quickly, there are still limited choices in a building platform. In my build, I planned on using a Jeep body; a HPI Rubicon body to be specific.
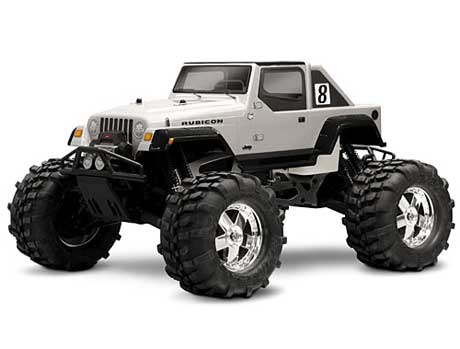
However, I also wanted to use leaf springs rather than the traditional coil over set up that most use on their crawler build. It was also important to me to have a chassis that resembles a real Jeep, two rail frame design. I came across a fairly new player to the rc crawling game, Diaz Designs, stationed in Gardena California. Diaz is more of an artist or sculptor, than a rc truck builder. Drooling over some of his “designs” on the net made a believer out of me and I wasted no time in choosing his DTrail12 custom aluminum chassis.

It was exactly what I was looking for, in that it had mounts for leaf springs, was light weight with a C-Channel design and looks like a true Wrangler frame.
I received the “backbone” of the build in less than three days after ordering from Diaz Designs and it was now time to get drive train parts that would work in conjunction with the complete YJ build. Tamiya TLT-1 axles are, without doubt, the most widely used, small scale axles used today in rc crawling and with their good looks and durability, it was an easy choice to use them in this project. I wanted all the pieces used on my YJ to be new and shiny so purchasing an entire TLT kit was expensive but worth it. The first order of business with any crawler build was to lock the differentials in the axles. The normal procedure of using JB Weld was used and thirty minutes later, I was popping in the completed diffs into the axle housings. These little axles are great for a scale build, as they really have that Dana look and also have many options as to which type of suspension to use.
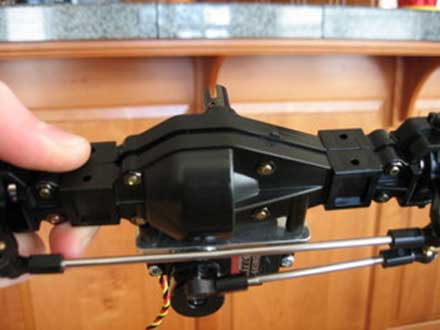
At the time of ordering leaf springs for the Jeep, there were two options: one was the springs from a Tamiya Juggernaut and the other was from an old Tamiya Bruiser. Both were multi-stage leaf packs with the Jugg springs being slightly firmer. Bruiser springs are hard to come by these days so I went with the Jugg springs, not knowing just how stiff they are, except for what I had read at rccrawler.com. After receiving the leaf packs, it was quickly decided to remove the center pin from each and to use only the one main leaf at each axle corner.
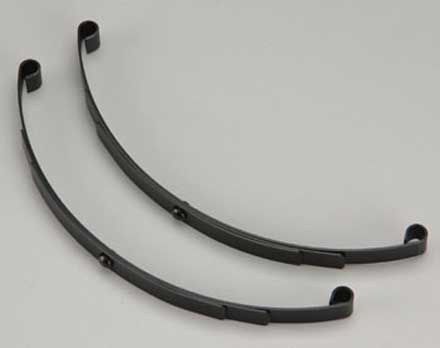
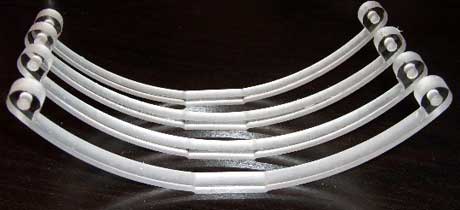
This provided some flex but not nearly enough. A common ailment with this set up is that the springs bind in the shackles, limiting travel even more. By grinding each spring eye down to about half its original width, it is able to move and flex at the shackle mounting point, which does wonders in loosening up the stiff suspension. The minds at Diaz Designs began to work on a better mouse trap and what the outcome provided is a new spring that will likely sell thousands! Keeping a single leaf design, Diaz concluded that only a different material was needed to free up much needed travel for my YJ. Polycarbonate (Lexan) was determined to be the ultimate flex material, as it could return to shape after tons of flex and can easily hold up to the tortures of time and the elements. The springs come clear, in true rc Lexan form and need to be shot with some quality Pactra paint, then drilled to mount. Once you go Lexan, you never go back!
The YJ was now a roller, with completed and locked axles, a beautiful Diaz Chassis and Polycarbonate springs atop the axles. Diaz also provides spring perches, cross members for the frame and a steering servo mount, all milled from super hard Delrin plastic. A roller yes….but with no wheels and tires. A critical decision indeed! What to use? This had to be a rig that could perform while looking good so it was an easy choice on which company to use for tires. Of course, Proline Racing! No other tire in the 2.2 Crawler world bites the rocks better than the 2.2 Moab M2 compound tire.
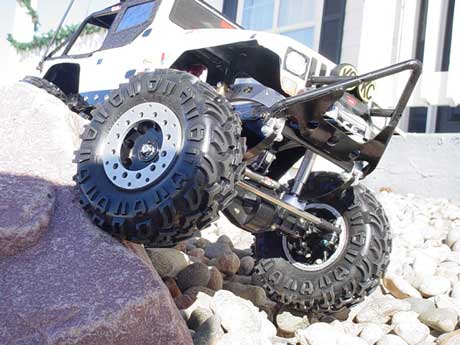
A call to Proline and the Moabs were on the way!
Today’s crawling trend is, ditching the super “blingy”, highly polished aluminum wheels in favor of black steel (or aluminum coated with Teflon) with raw aluminum bead locks. It’s a hot look that is affordable in the 1:1 world, as it is in the rc world. I spent a whole $8 on my four Traxxas Stampede wheels and used some $4 Fusion Plastic paint to get them the glossy black that I was looking for. Before rattling and shooting, I narrowed each wheel by removing the inside and outside mounting rings to give the wheel and tire combo a more scale look. “Hi! Diaz Designs? I would like to order four of your new aluminum bead lock, rock rings please.” That was all I needed to do to get my rings shipped out that day and it wasn’t long that the entire wheel and tire package was put together and actually turned the roller….into a roller.
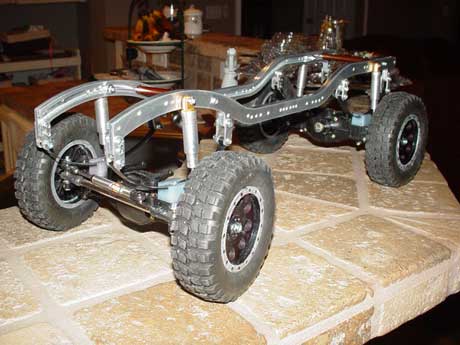
The whole project was starting to take shape but I knew that the real fun was about to begin, as the detail was now in progress. After the chassis, axles, wheels and tires were
all bolted together as one, it is now up to the builder to get creative and to set his rig apart from all the others. The first custom part that I made was a small, realistic, but non-working, AGR Rock Ram Power Assist. It was only after making this tiny part that the bug had completely gotten under my skin and I knew that I wanted to make this one of the most original scale builds to date.
Mentioned earlier was the use of a HPI Jeep Rubicon body. Jeep Rubicons don’t have leaf springs….but the older YJ Wranglers do… so the Rubicon body was easily transformed into a YJ’esc piece of Lexan. By painting in some black, SQUARE, head light bezels and cutting the round head light stickers square, it looked much more like a YJ. I also put the orange turn signal light stickers under the head lights and basically completed the simple swap.

Next in line was to remove the molded in roll bars that resided behind the Jeep cab. I wanted a full roll cage in the cab, which would also extend over the passenger area of the Jeep. Brazing brake line tubing is traditionally the path taken to accomplish this, and at first, was my method of choice. However, I did not want to make my YJ that top heavy and I knew that adding a lot of metal to the body would make the rig unstable and it would become a carnage magnet. Believe it or not, scouring the shelves at Toys R Us paid off big! I found a GI Joe buggy type vehicle that had some sort of a full roll cage made from a light weight plastic. It looked as if I could use some part of the cage system with a few modifications. Needless to say, with a few snips, a Dremel Tool and a Propane torch, the cage came out near perfect!
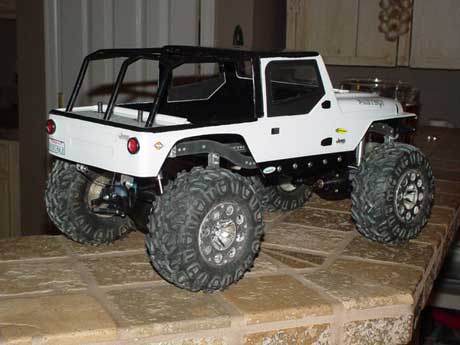
A little creativity went a long way! The cage was mounted and it was on to get in touch with my more feminine side.
When my wife wasn’t looking, I snatched one of her three sewing machines and began designing a template for a three piece soft top system. The main piece was a full length bikini top, along with a taneau cover for the rear and a Bestop type, WindJammer. A visit to Broomfield, Colorado paid off, as the fine people at Bestop gave me some remnants of their very own SailCloth….the same material used on all Jeep tops! It was back to the sewing machine to get stitching! After seeing the horrors of what I was turning out, my trusty wife stepped in to take over behind the foot pedal. I must say, most men have no business trying to sew and by seeing the finished work of my better half, it is apparent that I owe her a fine dinner and a movie. The top system may be the YJ’s most obvious upgrade and makes the Jeep absolutely beautiful! All three pieces are a perfect fit and I can see no way to improve the whole package, down to the excellent and realistic stitching to the small plastic windows. The WindJammer rolls up just like the real thing and so does the bikini top, after you unbuckle the rear straps. Nice!
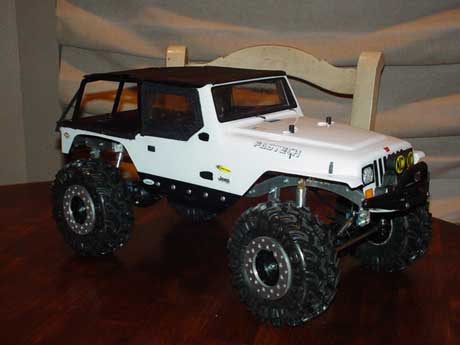
Finish Line RC in Denver, Colorado stepped up with the TLT Kit and I knew that Dan Conner would also provide the rest of the drive train, such as the Traxxas Stampede transmission and drive shafts, 55 Turn Integy lath motor and all the other small parts necessary to get the YJ moving under its own power.
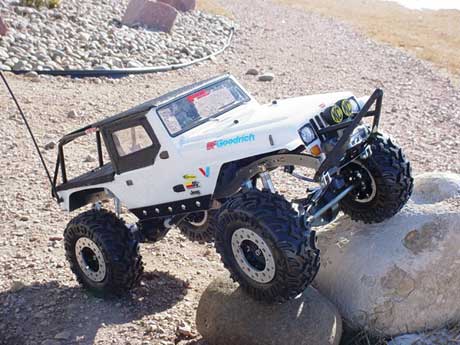
After installing the tranny, I quickly fashioned a somewhat crude, yet effective, skid plate from Lexan. The drive train dropped in easily, which gave me more time to look more at the Jeep cosmetics. Stinger bumpers seem to be all the rage these days and Poison Spider Customs is the leader in that area. A quick drive through Cliftons parking lot and I had enough ideas to keep me busy for a while. Again, wanting to keep the rig light weight, it was decided to fabricate the Stinger from Delrin plastic.
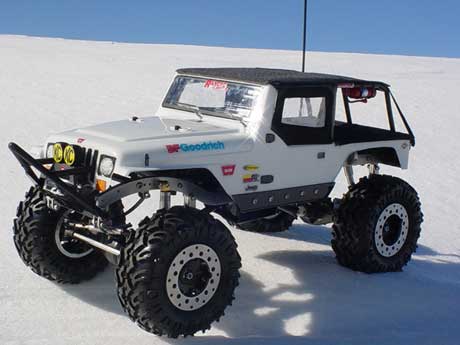
Seeing how easy it was to use the Propane torch on plastics during the cage modification, I tried it again and created a Stinger that is fitting for this project.
The aesthetics portion of the Jeep were coming along nicely and seem limitless, like the whip antenna, the miniature fire extinguisher, the KC Running lights and the full rocker panel protectors but there is still much more to do in the performance department. By triangulating the rear shocks with a new and longer shock mounting bar, I have achieved twice the amount of wheel travel in the rear. I am also considering the use of an “old school” buggy leaf system, a la Shannon Cambell or some “Revolver” type shackles, to gain huge travel. A rear bumper with integrated spare tire carrier is also in order, as are more parts that will serve as functional pieces, as well as cosmetic.
While this project seems to be almost finished, it is in fact, barely started! Next month, as I scramble to find and fab more cool little parts for the YJ, I will simultaneously be working to get this little Jeep to be a real performer. I think it is on its way, don’t you?


 Your Privacy Choices