A differential cover is often overlooked when it
comes to the axles. Many people choose to ignore the fact that the
thin metal cover is not much protection between your gears and a
rock. The stock covers hold little fluid and doesn't offer any
cooling. You would be surprised how hot a differential will get
when towing or if you're running large tires. And if you happen to
be running a chrome cover, that's actually worse since the chrome
holds in heat. After going through the cost of a front Dana 60 and
rear GM 141 bolt, (14-10.5) plus the cost of the Detroit locker in
the rear and the ARB air locker in the front, we wanted a better
differential cover to protect our investment. Basically, we were
looking for something that could offer added fluid capacity,
aluminum construction for better cooling and the ability to take
any off-road abuse we may encounter. Mag-Hytec covers offered
everything we were looking for not to mention the covers came with
a magnetic drain plug and a dipstick for monitoring fluid levels.
For our needs, the Mag-Hytec diff covers provided a logical fit.
Features of Mag-Hytec covers:
The first thing noticeable when you take the 14-bolt cover
out of the box is the weight and depth of the unit. The mounting
flange thickness is 1/2-inch and the cover is 1/4 to 3/8-inch
thick. As well as offering increased lubricant and cooling capacity
(up to 45 degrees cooler), Mag-Hytec covers set your vehicle apart
in both aesthetics and function - cast in A356-T6 aluminum and
textured powdercoated black with machined cooling fins. Magnetic
drain plugs trap worn gear material promoting fluid integrity. Each
unit is fitted with ARP 568 O-rings for superior sealing. All
hardware is 303 stainless steel to avoid corrosion. After
installing a Dana 60 cover on the front axle, the tie rod will be
fairly close to the cover due to its size, but it should fit. Just
position the cover sideways and finagle it in between the gears and
the tie rod until it drops down into position. Under full lock
(wheels turned all the way in one direction) the tie rod is very
close to the cover but does not come in contact with it.
Hold the chrome please
Ok, we admit running the chrome diff covers in the past. The main problem with chrome is it holds in heat which isn't what you want for a cool axle. Heat can kill gears so this is important to us with our new gears. Another problem with most chrome covers is they are usually much thinner than the stock cover. We noticed this with the chrome 14-10.5 cover we were running previously. It wouldn't take much to dent it on the trail. Why a Magnet?
As the metallic components in transmissions and axles wear, they generate very fine particle debris that becomes suspended in the lubricating oil. A suspended magnet acts as a filter to contain the particles, keeping the fluid cleaner and extending component life. Periodic checking and cleaning of the magnets is recommended for maximum fluid service life. New Gears?
You just purchased a new ring & pinion and you're ready to feel the power. Hold on! That new gear set may become scrap metal faster than you can say "burned up oil". All new ring & pinion sets run hot until they are "broken in" and in some situations they can run hot enough to break down the gear oil and damage the gear set. Some of those situations are:
Installation is easy because the covers come with all the hardware that you need, including the proper size allen wrenches and very detailed instructions. We installed these covers the same time the gears were changed which is the reason why it's on a lift. The covers can easily be installed with the vehicle on ground. Note: For some installations, removing the spare tire may provide better access to the work area. However it is not necessary in every case. The installer should determine if there is adequate workspace prior to starting the installation.
Maintenance:
The Mag-Hytec cover is constructed of high quality aircraft aluminum and has a powder-coated finish. The bolts and washers are stainless steel. These components require no maintenance. From time to time you may wish to check the oil level and monitor the wear in your differential. With the Mag-Hytec cover this can easily be accomplished by removing the dipstick assembly using a 1/4allen wrench. You will probably notice some fuzzy metallic particles on the magnetic end of the dipstick: this is normal wear. Wipe the dipstick clean and reinstall (thread all the way in), remove the dipstick and check the oil level. If the level is between the high and low marks on the dipstick, apply a thin film of oil on the dipstick assembly O-ring and reinstall the assembly snugly (20 in. lbs.). DO NOT OVER TIGHTEN. We suggest you follow the manufacturer recommendations for the gear lube drain intervals. You may change your gear lube without removing the Mag-Hytec cover. Park your vehicle on level ground with the parking brake applied. Position a drain pan under the drain plug located at the bottom of the pan and remove the drain plug assembly. You may notice metallic particles on the magnetic drain plug. This is normal wear. (If you notice any larger chips of metal on the magnetic portion of the plug, further inspection should be performed. We suggest that a professional mechanic who specializes in drive train components perform this inspection.) Remember to clean the drain plug assembly prior to reinstallation. Apply a thin layer of oil to the drain plug O-ring and reinstall (30 in. lbs.). DO NOT OVER TIGHTEN. Follow the procedure for filling the differential. Note: When checking the oil level remember to thread the dipstick assembly in by hand until it's snug against the o-ring. Should it become necessary to remove your Mag-Hytec cover for any reason, the Mag-Hytec cover O-ring may be reused. DO NOT USE ANYTHING TO PRY THE COVER FROM THE DIFFERENTIAL HOUSING. THIS WILL DAMAGE THE O-RING. If you have damaged the O-ring, you may obtain a replacement. If you need to reinstall the cover and no O-ring is available, you may run a bead of RTV silicone or gasket on the Mag-Hytecs mating surface face and reinstall the cover in the conventional manner. During your vehicles use, you may come in contact with water above the axle seals or above the axle breather. You should inspect your gear lubricant at the earliest opportunity. Do so by following the oil level check procedure. If water is detected, follow the drain procedure and refill your differential following the fill procedure Conclusion:
The differential covers are very impressive with the quality and workmanship coming from Mag-Hytec. These covers deliver functionality, a tough look, and should provide years of trouble free service. Maintenance is a breeze using these covers. We've already had some positive comments on these covers and they really set your vehicle apart from the others. By far, these are the best covers we've ever seen and are worth every cent. Be sure to call Mag-Hytec or stop by their site and let them know Off-Road.com sent you!
- Cast in thick A356T6 aluminum
- Increased lubricant and cooling capacity (usually double)
- Fluid runs up to 45 degrees cooler
- Equipped with a magnetic drain plug
- 1/8 NPT temperature sender fitting
- Lube reference plug (for stock level)
- Magnetic dipstick for checking fluid level and condition
- Dipstick, drain, and reference plugs are MS 33649 and fitted with AS 568 O-rings
- Large O-ring cover gasket, which requires no sealant or gasket
- All hardware is stainless steel (on rear covers)
- Cover is texture-powdercoated in black
- Cooling fins
- Offers easy routine maintenance without removing the cover
- Everything included for a "do it yourself" service and installation (includes tools)
- Stainless steel hardware
- Lifetime Warranty
|
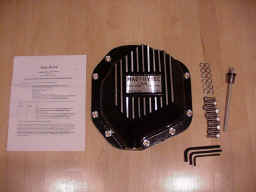
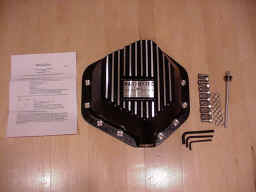
Mag-Hytec
cover come with everything you need to do the install and upkeep
including the bolts and tools. The Dana 60 cover is on the left and
the 14-10.5 cover is on the right. These covers are super thick and
are much larger than stock.
Click picture for larger
image
|
|
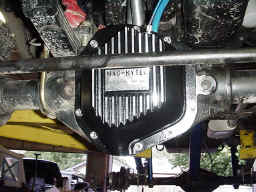
At full turn,
the tie rod comes close to the cover but still clears.
Click picture for larger
image
|
Ok, we admit running the chrome diff covers in the past. The main problem with chrome is it holds in heat which isn't what you want for a cool axle. Heat can kill gears so this is important to us with our new gears. Another problem with most chrome covers is they are usually much thinner than the stock cover. We noticed this with the chrome 14-10.5 cover we were running previously. It wouldn't take much to dent it on the trail. Why a Magnet?
As the metallic components in transmissions and axles wear, they generate very fine particle debris that becomes suspended in the lubricating oil. A suspended magnet acts as a filter to contain the particles, keeping the fluid cleaner and extending component life. Periodic checking and cleaning of the magnets is recommended for maximum fluid service life. New Gears?
You just purchased a new ring & pinion and you're ready to feel the power. Hold on! That new gear set may become scrap metal faster than you can say "burned up oil". All new ring & pinion sets run hot until they are "broken in" and in some situations they can run hot enough to break down the gear oil and damage the gear set. Some of those situations are:
- Towing
- Tall tires
- Heavy loads
- High numeric gear ratios (4.56 & up)
- Motorhomes
Installation is easy because the covers come with all the hardware that you need, including the proper size allen wrenches and very detailed instructions. We installed these covers the same time the gears were changed which is the reason why it's on a lift. The covers can easily be installed with the vehicle on ground. Note: For some installations, removing the spare tire may provide better access to the work area. However it is not necessary in every case. The installer should determine if there is adequate workspace prior to starting the installation.
- Park your vehicle on level ground and apply the parking brake
- Position a drain pan under the differential to catch the old gear lube.
- Remove the 10 existing bolts, starting at the bottom. (14-10.5 Mag cover has 12 bolts)
- Using a gasket scraper, start at the bottom of the cover and carefully (so as not to gouge the housing metal) insert between the existing cover and gear housing and pry the old cover off.
- Allow all of the old gear lube to drain.
-
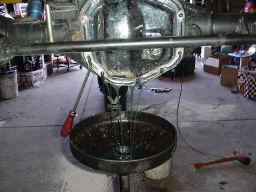
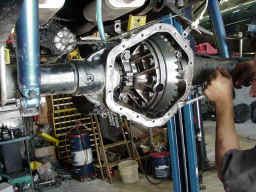
The wretched smelling gear oil is drained and cover is removed.
Click picture for larger image - Using a gasket scraper, carefully remove all of the old gasket material (dried silicone) from the housing. A wire brush may be required to aid in cleaning the gasket surface.
-
The old gasket is removed using a scraper.
Click picture for larger image - Use clean lint free rags to wipe down the remaining oil from inside the housing and to clean the housing gasket surface. The surface must be clean and flat for the Mag-Hytec O-ring to seat.
- Before installing the new Mag-Hytec cover, check the gasket-mating surface on the differential housing for dents, irregularities, or gouges. Should any exist, carefully remove the high spots using a smooth flat file. BE CAREFUL NOT TO ROUND OFF THE FLAT GASKET SURFACE.
- Using gear lube, apply a light thin layer of oil to the Mag-Hytec cover O-ring.
- Position the cover by aligning the bolt holes and start one of the new stainless steel allen cap screws and stainless steel washers at the top bolt hole and continue around the bolt pattern until all 10 bolts and washers are installed finger tight.
-
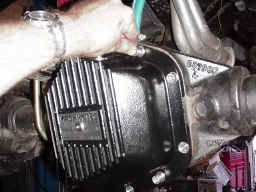
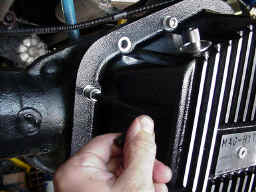
The cover is placed on the Dana 60 the bolts are started.
Click picture for larger image - Using a 5/16 hex bit and 3/8 drive torque wrench, torque the stainless allen cap screws to 25-30 ft. lbs. in a cross tight pattern.
-
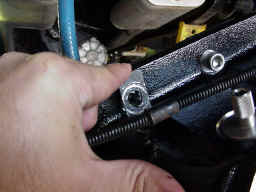
Note: When installing the cover on a 14-bolt axle, the brake line bracket that attaches to the cover via a cover bolt will have to be modified. Simply remove the brake bracket and round the corners off with a grinder until it fits into the cover bolt indentation. There was another clip on the left that had be ground also.The screws are tightened with the supplied allen wrench. Later the bolts are tightened to 25-30 ft. lbs.
Click picture for larger imageWe ran into a little snag where the brake line brackets didn't want to cooperate. A little grinding action took care of that.
Click picture for larger image - Check the drain plug, oil reference plug, and 1/8 pipe plug for tightness. If you are going to install a temperature sender, do so at this time. Remove the 1/8 pipe plug and install the sender in its place. BE SURE TO USE LPS ALL PURPOSE ANTI-SEIZE OR EQUAL ON THE SENDER'S PIPE THREADS DO NOT OVER TIGHTEN!
- Remove the dipstick assembly, and add in the new gear lube.
Your new cover will take approximately 4 quarts for the Dana 14
bolt and 3 quarts for the Dana 60. There are two marks on your
dipstick. The bottom mark represents the minimum fill line and the
top mark is the maximum fill line. YOUR OIL LEVEL SHOULD BE BETWEEN
THESE LINES. Note: when checking the oil level, remember to thread
the dipstick assembly until the assembly is threaded in all the
way. Remove the dipstick assembly and check the level. If the oil
level is between the two lines, apply a thin film of oil to the
dipstick assembly O-ring and reinstall. Tighten snugly (30 in.
lbs.). BE CAREFUL TO NOT OVER TIGHTEN THE ASSEMBLY.
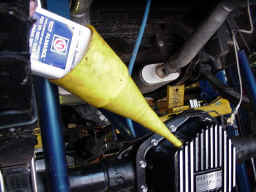
Note: If you have a special application vehicle, or your vehicle has been modified or lifted and the axle has been rotated, you will have to establish the correct oil level for your vehicle as the dipstick marks as supplied by Mag-Hytec will not apply. The correct oil level should be between the bottom of the inside of the axle tube and bottom of the axle shaft. Once you have established the correct level, scribe a reference line on your dipstick for future reference, and fill the differential.The differential is then filled with LE gear oil through this handy dipstick hole.
Click picture for larger image - If you have a limited slip differential, be sure to add the appropriate amount of friction modifier. Mag-Hytec suggests Chrysler friction modifier, which is compatible with Amsoil synthetic gear lubes. (ONE TO TWO 4 OZ. CONTAINERS SHOULD PROVIDE THE DESIRED RESULTS.)
|
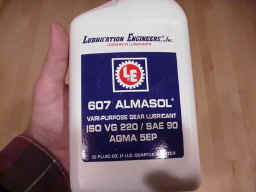
Mag-Hytec
suggests using this oil from Lubrication Engineers. This gear oil
has undergone extensive testing and was rated excellent results.
Mag-Hytec also sells this oil.
Click picture for larger
image
|
The Mag-Hytec cover is constructed of high quality aircraft aluminum and has a powder-coated finish. The bolts and washers are stainless steel. These components require no maintenance. From time to time you may wish to check the oil level and monitor the wear in your differential. With the Mag-Hytec cover this can easily be accomplished by removing the dipstick assembly using a 1/4allen wrench. You will probably notice some fuzzy metallic particles on the magnetic end of the dipstick: this is normal wear. Wipe the dipstick clean and reinstall (thread all the way in), remove the dipstick and check the oil level. If the level is between the high and low marks on the dipstick, apply a thin film of oil on the dipstick assembly O-ring and reinstall the assembly snugly (20 in. lbs.). DO NOT OVER TIGHTEN. We suggest you follow the manufacturer recommendations for the gear lube drain intervals. You may change your gear lube without removing the Mag-Hytec cover. Park your vehicle on level ground with the parking brake applied. Position a drain pan under the drain plug located at the bottom of the pan and remove the drain plug assembly. You may notice metallic particles on the magnetic drain plug. This is normal wear. (If you notice any larger chips of metal on the magnetic portion of the plug, further inspection should be performed. We suggest that a professional mechanic who specializes in drive train components perform this inspection.) Remember to clean the drain plug assembly prior to reinstallation. Apply a thin layer of oil to the drain plug O-ring and reinstall (30 in. lbs.). DO NOT OVER TIGHTEN. Follow the procedure for filling the differential. Note: When checking the oil level remember to thread the dipstick assembly in by hand until it's snug against the o-ring. Should it become necessary to remove your Mag-Hytec cover for any reason, the Mag-Hytec cover O-ring may be reused. DO NOT USE ANYTHING TO PRY THE COVER FROM THE DIFFERENTIAL HOUSING. THIS WILL DAMAGE THE O-RING. If you have damaged the O-ring, you may obtain a replacement. If you need to reinstall the cover and no O-ring is available, you may run a bead of RTV silicone or gasket on the Mag-Hytecs mating surface face and reinstall the cover in the conventional manner. During your vehicles use, you may come in contact with water above the axle seals or above the axle breather. You should inspect your gear lubricant at the earliest opportunity. Do so by following the oil level check procedure. If water is detected, follow the drain procedure and refill your differential following the fill procedure Conclusion:
The differential covers are very impressive with the quality and workmanship coming from Mag-Hytec. These covers deliver functionality, a tough look, and should provide years of trouble free service. Maintenance is a breeze using these covers. We've already had some positive comments on these covers and they really set your vehicle apart from the others. By far, these are the best covers we've ever seen and are worth every cent. Be sure to call Mag-Hytec or stop by their site and let them know Off-Road.com sent you!
|
|
|
Mag-Hytec
offers covers for other applications which includes Dana 44, Dana
70, Dana 80, Dana 60, GM 10-8.5, GM 14-10.5, GM 14-9.5, Ford
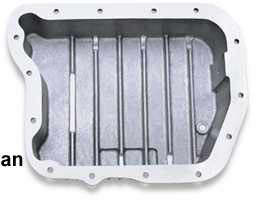
10-8.8, and Ford 12-10.25. They also have transmissions pans for
the Dodge 727, Ford E4OD, and GM 4L80E. |
 Mag-Hytec, Inc. 14718 Arminta St. Van Nuys, California 91402 (818) 786-8325 (818) 786-0560 (FAX) E-Mail: info@mag-hytec.com www.Mag-Hytec.com |
Questions or comments about this page should be
directed to
chevy@off-road.com
Back to Project Potent Rodent Back to the Chevy WebPages
chevy@off-road.com
Back to Project Potent Rodent Back to the Chevy WebPages
Follow @Off-Road




 Your Privacy Choices