|
If you prefer an open air feel, but don't want
the sun beating down upon the back of your neck, the top can also
be transformed into a canopy. Instead of folding the windows
up in the top, you roll the rear window and sides up, and secure
them with the straps built into the top. This has quickly
become my favorite option about the top. You get almost the
same amount of air through the vehicle, but don't have the sun
directly on you.
The vinyl top is well crafted and fit the truck
perfectly. The top is available in many colors, and in more
than one texture. I chose the black, smooth vinyl for my
4Runner. The vinyl has a cloth backing that makes the inside
look quite nice, and helps to cut wind noise. The bows and
hardware are all steel, and the rails that must be mounted to the
vehicle are made of aluminum. Any
do-it-yourselfer can install this top in a day. Installation
took me about 6 hours, including a meal and a trip to the hardware
store for more 1/8" drill bits. Follow along as I give you a
fly-by of the installation.
INSTALLATION
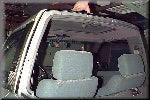
Of course you
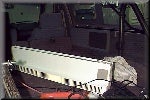
must begin by removing the factory hard top. Consult your
owners manual for instructions. You'll need only a 12mm
socket and a phillips screwdriver. The installation requires no special tools. I do
recommend having two drills around though. We cut a lot of
time (and muscle wrenching!!) off our installation by having one
drill with a phillips bit in it, and using the other to drill our
holes. You will drill over 50 holes
before this installation is complete (about half are drilled into
the 4Runner body). I recommend also having several 1/8" drill
bits handy. I broke five 1/8" bits during this
installation. When drilling through the cab the drill bits
often went through the first layer of sheet metal, caught more
metal inside the cab structure and broke off.
Step 1-
Body Aluminum
Mount rear body aluminum to top edge of
body. Match the bend of the aluminum body piece to the bend
in the raised part of the body. Drill holes, and attach with
sheet metal screws as described in Kayline's
instructions.
Step 2 -
Tailgate Aluminum
Mount tailgate aluminum to the
top edge of tailgate centered from side to side. Tailgate
aluminum should be mounted as far to the rear of flat edge on
tailgate as possible. Drill holes and secure with sheet metal
screws as described in Kayline's instructions.
Step 3 -
Cab Aluminum
Remove rubber weatherstrip from rear of
cab. Save for future use with your hard top. As per
Kayline instructions, attach cab aluminum and bend to fit shape of
cab.
Step 4 -
Bow Mount & Step 5 -
Bows
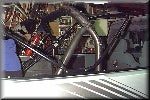
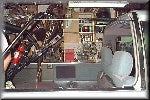
Measure 42" from rear of cab and mark for
position of bow mount. Install bow mount and bows as per
instructions.
Step 6 -
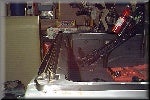
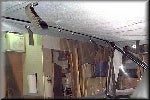
Horizontal Rods
Mark and drill 1/2" hole, 3/8" above body seam at
rear of cab. Pull front bow forward and insert small end of
horizontal rod into hole in front bow. Insert other end into
1/2" hole drilled in rear of cab.
Step 7 -
Footman Loop
Place footman loop on top of
body at rear corner of vehicle (see drawing in Kayline
instructions) Drill 1/8" holes and attach using #8x1/2" oval head
sheet metal screws.
Installing Vinyl
Top
When installing the soft top the
surrounding temperature should be 70 degrees or more. When I
was installing my top the temperature was only 55-60 degrees and it
was causing a lot of trouble with the
installation.
My solution to the
temperature problem was to put my space heater in the 4Runner with
the top draped in place. I was able to get the inside of the
truck up around 90 degrees, which made the vinyl top soft and
pliable. This trick was a life saver!!
The fit of the vinyl top is absolutely custom,
which insures a great fit. It also requires you to install it
just as the instructions say. There are no holes drilled into
the aluminum rails you previously installed. You must first
drill holes in the proper place to attach the snaps for the
top. You use the vinyl top as your template. This
ensures the top will fit as it was designed.
Begin at the top center of the cab. Install
the first snap stud, and attach the top. Now you will begin
working your way down the sides of the cab, alternating left and
right with each stud you install. As you go stretch the top
tight, and locate the the proper place to install each stud.
Snap top to each stud before installing next stud.
Snap rear bow flap on vinyl top to rear
bow.
Measure and mark the center of your
tailgate. Drill hoes and install studs as per Kayline
instructions. Alternate left to right as you did on the
cab. Stretch the vinyl as you go... its a tight
fit.
Just as you installed the studs on the cab you
will now install the studs along the sides. Begin at the rear
corner and work your way forward. Snap top to each stud
before installing next stud.
Once the last of the studs are put in
place, your installation is finished. You're ready to go out
and have fun in your new soft top. If you want to reinstall your
hard top one day, the aluminum rails will need to be removed from
the body. Its a small price to pay for the fun and weather
protection you get with the Kayline top. |










 Your Privacy Choices