There are several heavy duty front axle choices for the Jeep CJs. I considered the Dana 60, but decided for my needs that it was overkill for my 6 cylinder CJ; it was too heavy, had less clearance, and that it would require too much alteration to make it fit. Also considered was the Ford 9" front end, but again I rejected it as the pinion exits too low, and it would also require significant fabrication to make it work. The newer high pinion Ford 9" (which only has an 8.8" ring gear) looked good on paper, but was very expensive. In the end, the tried and true Dana 44 was my axle of choice. I found it to be the best compromise between brute strength and weight, mass and clearance issues, and availability - both of donor parts, and of gear and locker choices.
Once I had decided on the Dana 44, I did some research, talking to people that had done this swap before. I found that no Jeep, or any other vehicle for that matter, had ever been built with a D44 front axle of the same width as the 1980's Jeep CJ models, the so-called 'wide track CJ', with a 55.8" front track width. To get a Dana 44 under my Jeep I would either have to buy a custom fabricated unit or I would have to modify an axle originally used in some other application.
With careful research I found that the best Dana 44 front axle donors for my CJ, with it's passenger side differential were:
- '73-80 Scout II
- '70's full sized Jeep Wagoneer
- Chevy Pickup or Suburban.
 |
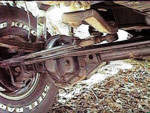
| Outer U-joints: Left is a Dana 30; Right is a Dana 44. |
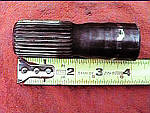
With 4" removed, the stock CJ width is retained. Another option would also be to cut it down only 3.25" and have a slightly wider axle that would give the Jeep a slightly wider stance and thus gain a bit more turning radius with big tires. The long side axle shaft was also cut 4" and then re-splined. The short side tube and axle shaft are not modified and remain completely stock.
 The existing spring perches and shock mounts on
the Dana 44 were cut off with a torch and the axle tubes were
cleaned up with a grinder.
UPGRADED RING AND PINION
GEARS
I wanted to
use the best, so I called Randy's Ring and Pinion. Randy is truly a
giant in the business, someone who gives expert advice along with
his parts sales. I was changing the ring gear and pinion in both my
new front axle and the rear axle, so I ordered the 'kit' (which
includes all necessary parts for the installation) for each: the
4.09:1 gear kit for the new front Dana 44 and the 4.10:1 gear kit
for my beefed up AMC 20 rear.
Because of the gear design and the number of teeth on both the ring
gear and the pinion, it is common to have a slight numerical
difference in the gearing, this is OK as it will make virtually no
difference as long as they are within one or two percent of each
other.
Be prepared for a project like this to take some time if you are
farming out some of the process. Everyone has some excuse. However,
overnight, I received the new ring and pinion gear kits from
Randy's Ring and Pinion. This certainly turned out to be the
quickest and most painless part of the whole project. Armed with my
new pile of parts, I delivered both my old Dana 30 and the new Dana
44 housing to 4-Wheel Parts Wholesalers in Burbank, CA., where Rody
Jarve and Mike McAtee worked with me on the axle set up.
Mike installed and set the new 4.09 ring gear and pinion and new
ARB Air Locker, along with new bearings and seals. He also removed
the outers from my Dana 30 and installed them on the Dana
44.
 SETTING THE SPRING
PADS
Since I
was retaining spring-over-axle configuration I already had, I would
need new spring saddle pads welded on top of the axle. I also
started collecting the weld-on mounts for reattaching the shocks to
the axle.
Since I had my old Dana 30 as a
template, I decided to do most of the welding on the bench. Once I
got the newly fabricated D44 axle housing to my garage, I set it
securely on two jack stands.
Using a degree gauge, or magnetic protractor to measure the
necessary angles, I set the knuckles (king pins) on the axle tubes
for 4 degrees of positive caster, which in this case happens to be
correct when the steering arm is parallel to the ground.
I then clamped the housing to the stands, supporting the rear
pinion with a block. This was my base measurement when it came time
to attach the spring perches. Since my old and new housings were
exactly the same width, I took measurements off the old Dana 30
housing to determine the placement of the spring pads on the new
Dana 44, and then trial fitted the spring pads in their new
locations.
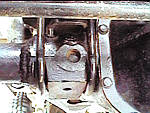
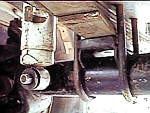
I also had to decide exactly which spring perches to use. I eventually was planning on moving to 2.5" wide Wrangler (YJ) front springs, as they are a bit flatter and flex better than the 2" wide, 7 leaf CJ spring pack I had built up. So I decided to use a 2.5" wide spring perch, even though I was not changing from the 2" wide CJ spring just yet. I used a low profile 2.5" wide perch made by Con-Ferr (#G-8036) on the passenger side, and the same perch with a 1/2" plate welded onto the pad for the drivers side (on the tube). Since one perch had to be mounted on the differential housing and one on the bare tube, the spacer was necessary to keep the perches matched vertically. Using Con-Ferr and Pin & Plate weld-on shock brackets (#G-8400), I welded on new shock absorber mounting brackets vertically aligned with the center of the axle and to the rear, with the outboard edge of the plate exactly 1" in from the knuckles on either side.
Each of the centering holes in the spring pads were centered 5 15/16" from the edge of the knuckles, with the distance between them being 27 3/8". This ensures that the springs drop vertically straight down from the frame, at least on my Jeep. My front axle was always off-center from the factory, and now it is perfectly centered.
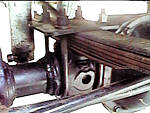
With everything positioned perfectly I securely clamped and welded all of the parts, re-measuring often along the way, using 7018 rod (with a higher nickel content for welding cast parts) and utilizing the on-board welder in my Jeep (which was up on jack stands with no front axle). Once I was satisfied with the welds, I re-mounted the wheels on the axle, and rolled the subassembly under the Jeep; lowered it onto the springs, settling into the centering holes, and then installing and reattaching the U-bolts, spring plates, drag link, brake hoses and shocks. The shocks now pivot on the same plane, unlike the stock positioning.
Upon completing the re-assembly of front axle, I drove the Jeep back to the folks at 4Wheel Parts Wholesalers (with a 4.09 front ratio, and a 3.54 rear ratio) to have the rear axle gears changed to 4.10, and the rear ARB Air Locker installed. ODDS AND ENDS
The 2-3/4" diameter tubes on the Dana 44 are much thicker (1/2" thick) and stronger than the 2-1/2" diameter tubes on the Dana 30, so new U-bolts had to be procured. I had 4 custom made U-bolts drawn, 4"diameter by 7-1/2" long. I cut some 5/16" plate and drilled 4 holes to use as spring plates on top. If I can find some original Wagoneer plates, I'll switch over to them.
I used the thick, flat front end Dana 44 differential cover and the tie rod still touched it just a bit at full steering lock, so I bent a slight curve into the tie rod to accommodate this, welding a 1"x1" angle iron gusset to the tie rod. The Dana 44 Pinion is 1 inch longer to the back of the pinion face, than the Dana 30, so the front driveshaft needed to be shortened by 1 inch.
As a result of changes, the front of the Jeep is now about 1" higher than before, but a switch to YJ front springs should bring it down to the desired altitude again.
Following years of fooling with the front anti-sway bar at the trailhead, I decided to just leave it off, for good, so I didn't weld on the anti-sway bar brackets this time. I felt that it was always in the way and cut down my turning radius with big tires. I run the shocks at a stiffer setting on the highway now, but don't have to disconnect anything at the trailhead. After a couple hard core trips under my belt, including a week at Moab, I am delighted by the performance of the axle upgrade. This project has given me significant peace of mind, and I am now comfortable that my axles are up to the the kind of hard core jeeping that I love.
Related Links:
Contact Information:
|
|
|||||
|
Advertising Inquiries Click Here
Copyright © 1999 by Jeff Reynolds,
All Rights Reserved


 Your Privacy Choices